Welcome to the Autodesk Installation Guide!
Autodesk is a software provider for a wide variety of CAD applications, many of which are used within the department and will be required in your classes. Fortunately, Autodesk allows students access to their software for FREE – unfortunately, the process can be a little confusing…
We in the A&E CAD Technical Support Team have compiled this guide to help students like yourself get access to the software you need in the simplest way possible. Please take the time to read and follow the instructions below carefully in order to get up and running as quickly as possible.
Instructions
Please click each header below in sequence to read and follow the steps required to install your software.
REGISTER
Register with the Autodesk Education Community. Only after registering will you be able to download and activate your free license of CAD software. To register with the community, read and follow the steps below.
Get Access
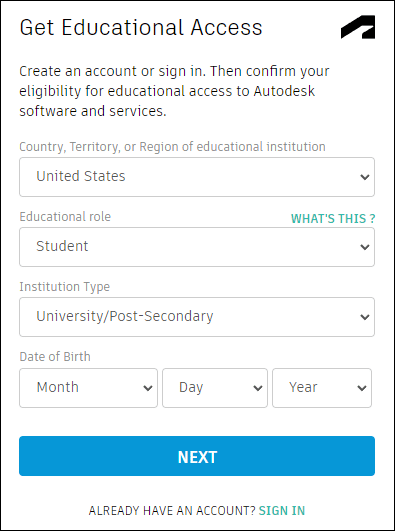
- Click here to open the Educational Registration page.
- Select United States under “Country”.
- Select Student as your “Educational Role”.
- Select University/Post-Secondary as your Institution Type.
- Enter your Date of Birth.
- Click Next to advance to the Account Creation page.
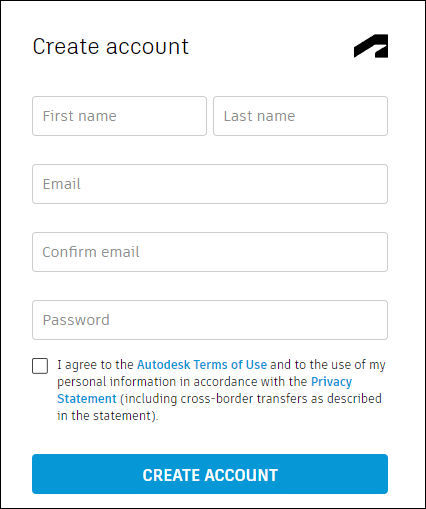
Create Account
7. Enter your First and Last name.
8. Enter your ACC student email address (ending in @g.austincc.edu).
9. Create a password for your new account and record it somewhere safe.
10. Click the checkbox to agree to Autodesk’s terms and conditions, then click Create Account.
Verify
- Afterwards, you will receive an email asking you to to confirm your account creation.

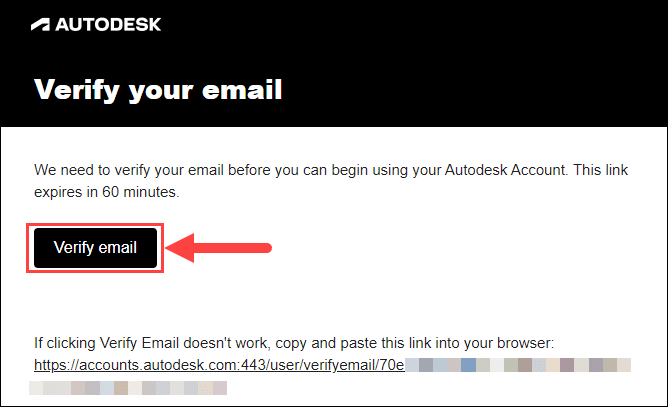
12. Continue with the steps below in the Account Verification section to complete the setup of your new account.
ACCOUNT VERIFICATION
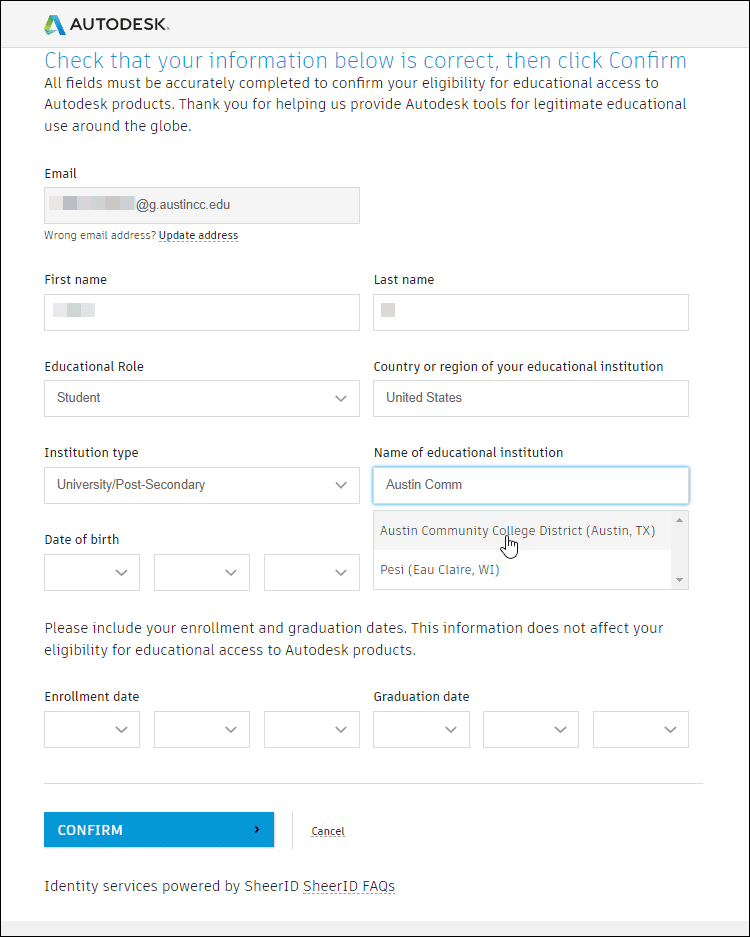
After you have verified your email address for your newly created account, you will be redirected to a page titled “Just one more step” where it asks for information about the educational institution you are attending and the dates you are attending. If you do not get redirected to the “Just one more step page”, follow the steps under Get Started:
Get Started
- Head to the Educational Access webpage.
- Click on Get Started.
- Select Sign in if you are not already signed in.

Verify New Account Information
Verify your newly created account and/or verify that you are a student.
If you already had an account, you may not need to re-verify, so you may skip to the Download section below.
Your information should automatically be populated, if not, make sure to fill out the following:
- Under “Educational Role”, select Student
- For the “Institution type”, select University/Post-Secondary.
- For the Name of educational Institution field, start typing “Austin Comm…” and choose “Austin Community College District (Austin, TX)” from the list that appears.
- Under “Enrollment date”, choose the Month and Year that you started classes at ACC.
- Under “Graduation date”, choose the Month and Year you are expecting to graduate (estimate if unsure)
- Click Confirm.
Verification
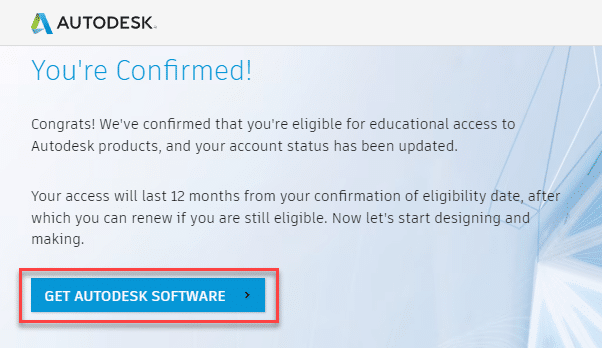
After you have entered and verified your information, you should now automatically be confirmed.
Proceed by clicking Get Autodesk Software.
Additional Verification
After creating your new account, you may be prompted to confirm some additional details.

Select Continue.
Enter the address for ACC Highland under the “School Address” field, along with the other requested information.
- Address: 6101 Highland Campus Dr
- City: Austin
- State: Texas
- Postal Code: 78752
- School website: https://austincc.edu
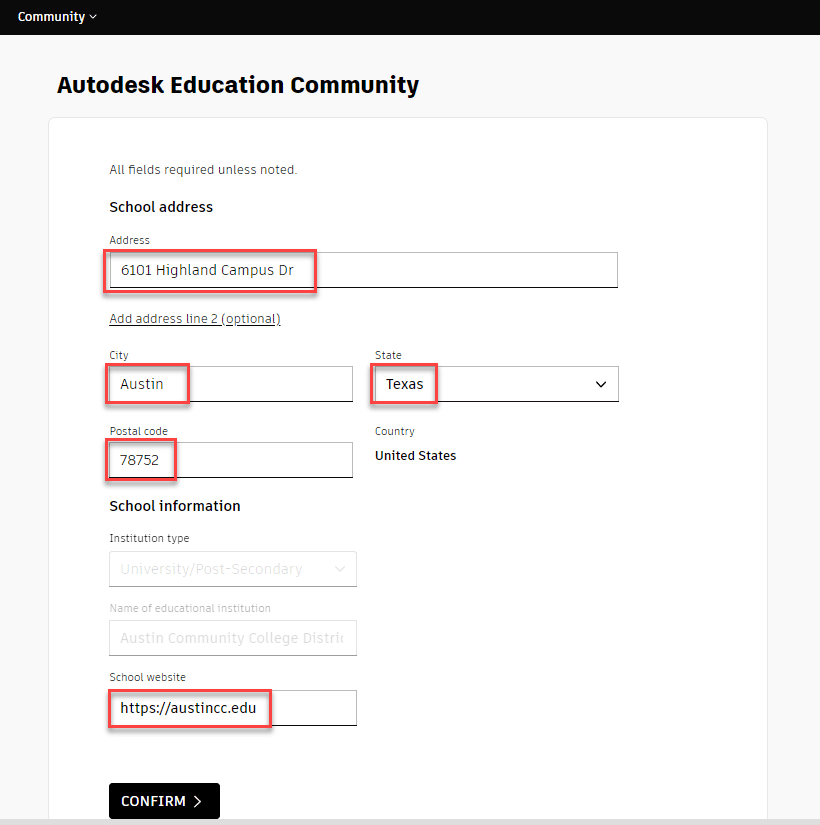
Then select Confirm.
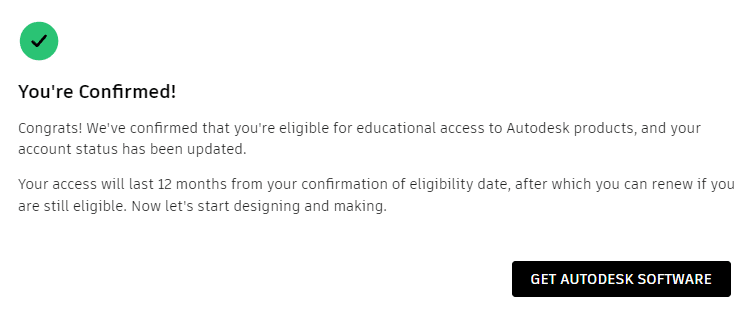
Confirmation
Once you’ve received confirmation, click “Get Autodesk Software” and proceed to the Download and Install section below.
DOWNLOAD
- Visit the Autodesk Education Community page.
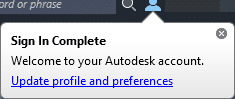
- If you are not already signed in to Autodesk’s website, click on the Sign In button in the top ribbon and sign in using the credentials you created during Registration.


The Sign In button will be replaced with your profile icon when you are signed in.
Locate Software
3. Find the software you wish to install using the filters provided or by scrolling down the page and viewing all available software.
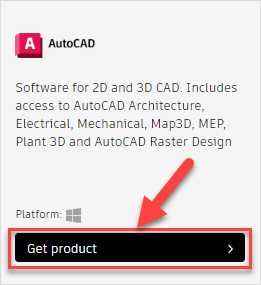
4. Once you have found the application you need, click Get Product link inside the software’s tile.
5. The tile will update to allow you to select your preferences and will reveal the Install button:
-
- Your operating system should be Windows.
- For your product version (select 2026).
- Select your preferred language.
Important
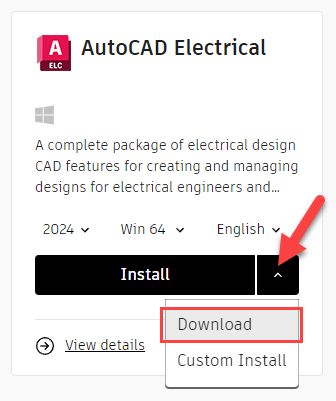
Once your selections are complete, click on the down arrow to the right of the Install button and select Download from the fly-out menu.
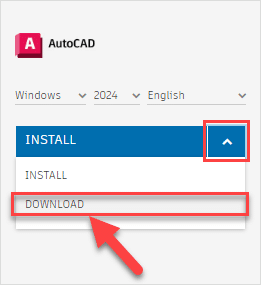
The Install option attempts to download and install the application at the same time, which often causes issues.
If you are installing Civil 3D, Inventor, or Revit, there are multiple install files that need to be downloaded – your browser may identify these additional downloads as pop-ups and block them.
IMPORTANT
Please make sure that Autodesk.com is on your browser’s list of trusted websites so that all install files are downloaded. If you need instructions for enabling pop-ups, please scroll down to the Troubleshooting section for browser-specific guides.


Extract
Once all downloads are complete, open File Explorer and navigate to your Downloads folder and double-click the install file to launch the self-extractor (any install file, if multiple downloaded).
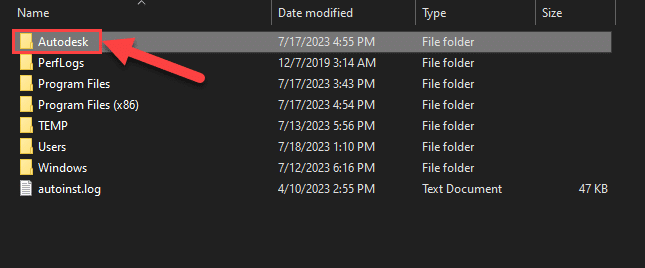
- A small window will appear and ask you for location where files will be extracted (defaults to C:\Autodesk).
- Click OK to proceed.

Follow the steps in the Installation section below to install your Autodesk product.
ELECTRICAL STUDENTS ONLY
Students enrolled in electronic CAD classes requiring AutoCAD Electrical and AutoCAD Plant will require additional instruction in order to obtain their software. Before beginning this section, please work through the guide to download and install AutoCAD, first.
- Return to the Autodesk Education page and sign in the same way detailed in the Download section of the guide.
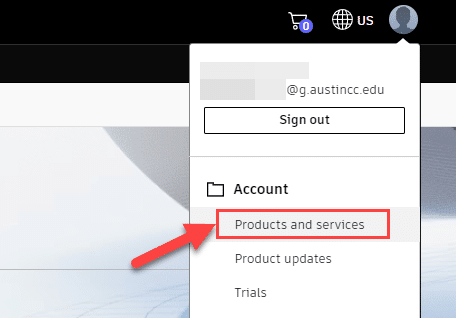
- Click on the same location you used to sign in.
- Click on the ‘Products and Services’ option from the fly-out menu.
- This will take you to the Products and Services menu, on the top left-hand side, select ‘All Products and Services‘.
- Here you will see all the products to which you currently have access.
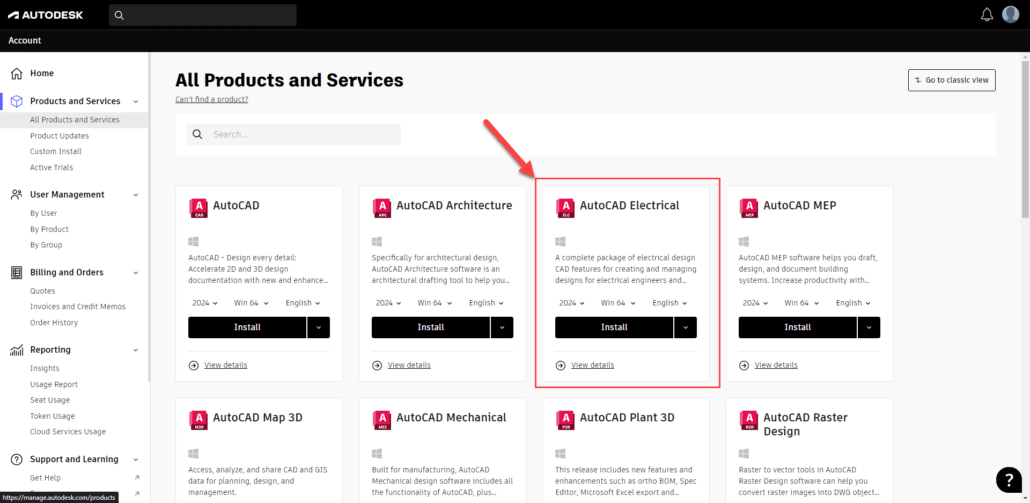
6. Find the AutoCAD Electrical tile and click on the drop-down arrow to the right, and select “Download“.
7. Once the file finishes downloading, click on the file ending in .exe to launch it.
8. You may get a security warning, click “Run” to continue.
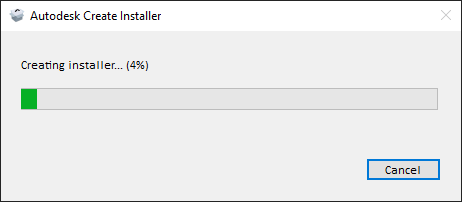
9. You’ll then be presented with an Autodesk wizard.
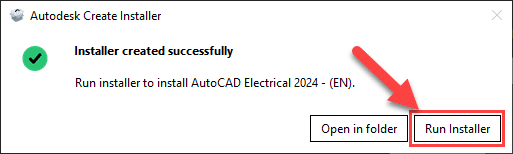
10. Once the wizard finishes creating the installer, click on “Run Installer“.
11. Click on the checkbox next to “I agree to the Terms of Use”, then click “Next“.
12. Leave everything as the default, then click “Next“.
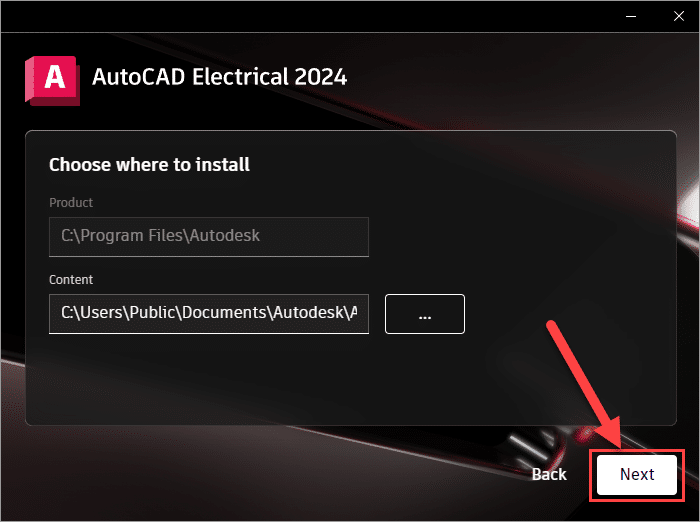
Reference
The default location for the “Product” should be `C:\Program Files\Autodesk` and the default “Content” location should be `C:\Users\Public\Documents\Autodesk\Acade 202X`.
13. If there are any extra components you need to select, make sure to check the box next to the component that you need, then select “Install“.
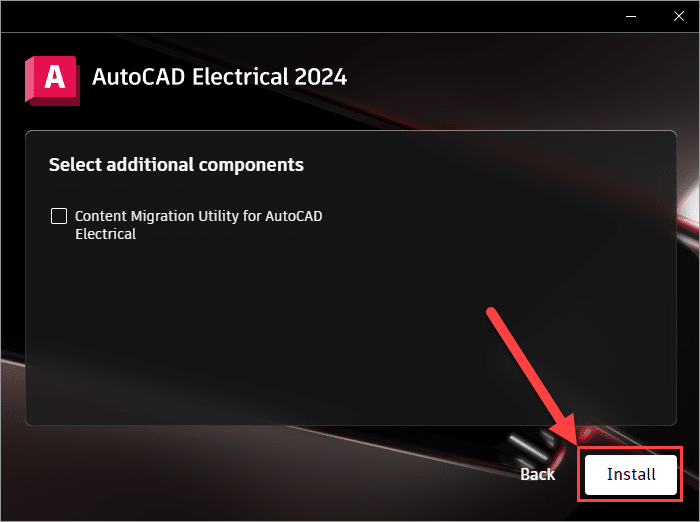
14. Once the installation process is complete, click on “Start“.
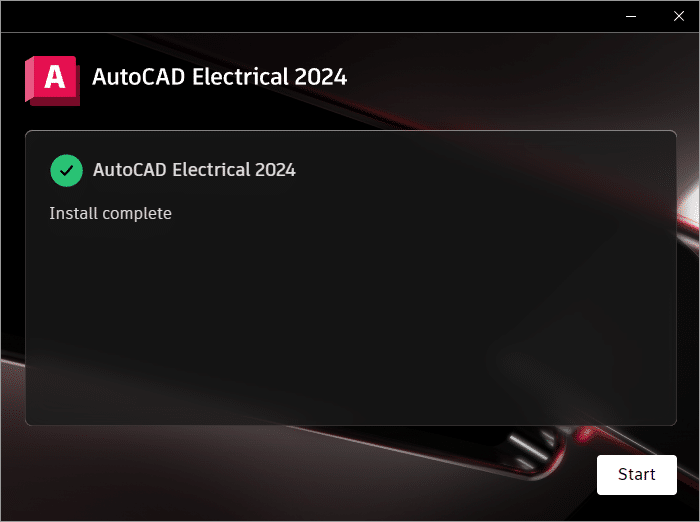
You should now be able to launch Autodesk Electrical!
INSTALLATION
Once the application has finished downloading and extracting, the setup should launch automatically. If the installer did not launch after extraction, scroll down and follow the steps under Locate Setup Wizard:
- You will be asked to accept the license and services agreement.
- Select “I agree to the Terms of Use“
- Then click Next.
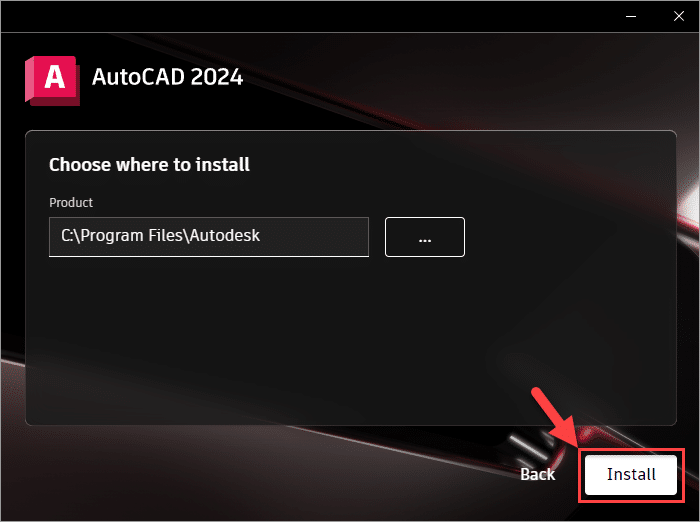
- Under “Choose where to install”, leave the location as the default.
- Then select “Install“.
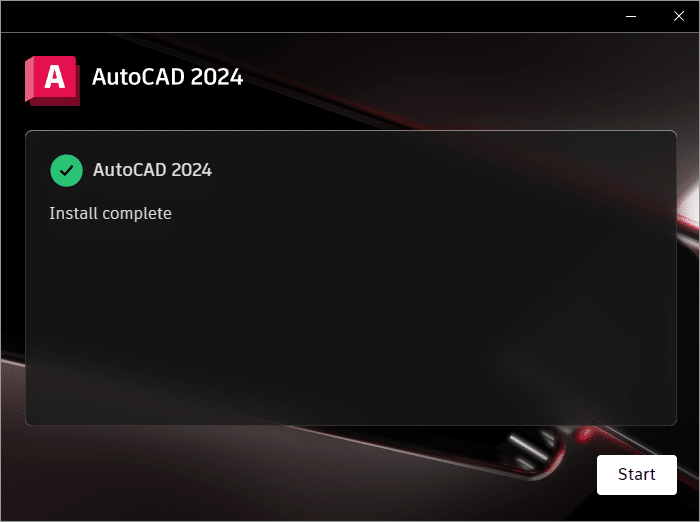
4. You should now see the software installation process begin. This may take some time depending on your system.
5. Once complete, click on “Start“.
Note
You may be asked to restart your computer. Select “Restart now“.
Follow the steps in the Activation section below to activate your Autodesk product.
Locate Setup Wizard
If the installation wizard did not automatically open, you will need to manually locate the Setup.exe file and relaunch the installer. The steps below should guide you through the process.
- Open File Explorer.
- Navigate to the C:\Autodesk folder.
- Locate a folder titled “Autodesk_[your software name]_[YEAR]_ML_Windows_64bit_dlm” and double-click to open it.

- Inside that folder locate the Setup.exe file and double-click it to begin the installation.

ACTIVATION
1. After the installation is complete, launch the software by clicking on the Start button from within the installation wizard (or locate the new application from the Start menu and click to launch it).
2. You will be presented with the splash screen pictured to the right.
3. Click on the Sign in with your Autodesk ID button to activate your product.
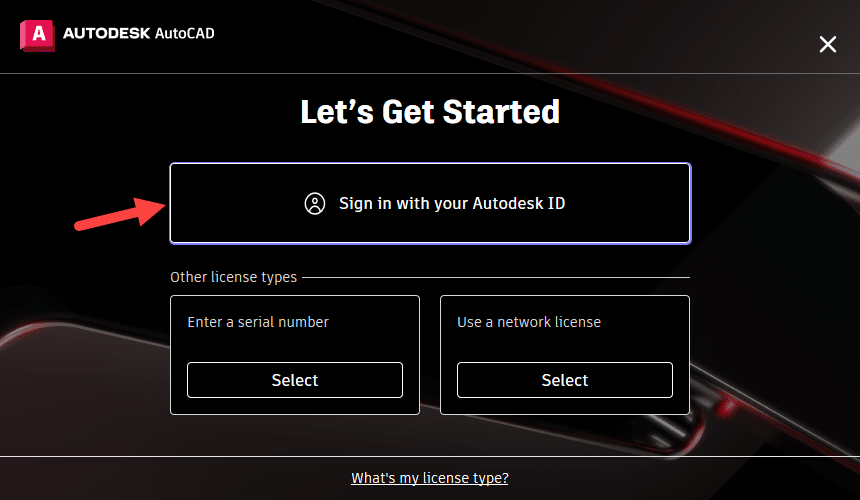
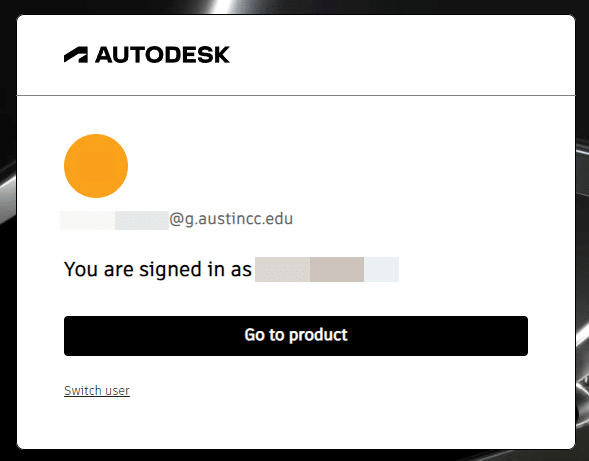
4. If you were previously signed in, continue by selecting Go to product.
If you need to login to a different account, select “Switch user”.
5. Your web browser may prompt you to open the Autodesk Identity Manager, click on Open Autodesk Identity Manager.

6. You will then be redirected to the Autodesk software.
7. On the top right-hand side, you should now see that you are signed in.
8. Once you are signed in, your product will be activated and ready for you to use.
Congratulations! You have completed the activation process and are now ready to use your selected software.
RENEWAL
Educational access to Autodesk software is managed on an annual basis; 30 days prior to your access expiration, Autodesk will send an email notifying you that your annual access is coming to an end. To renew your educational access, please follow the instructions provided below:
- Ensure you are still eligible for educational access by reviewing Autodesk’s eligibility requirements.
- Navigate to the Autodesk Education Community website and sign in to your account.
- Click Renew Now link in the personalized banner notification.
- Once you confirm your eligibility, your access will be automatically extended for another year.
If your access has already expired, you can restart your educational access by following the steps below:
- Ensure you are still eligible for educational access by reviewing Autodesk’s eligibility requirements.
- Navigate to the Autodesk Education Community website, sign in to your account.
- Click Restart Access link in the personalized banner notification.
- Once you confirm your eligibility, your access will be automatically extended for another year.
Any product subscriptions that you hold will also be automatically extended for another year.
TROUBLESHOOTING
Verification Issues
Autodesk’s new verification process is not without shortcomings and pitfalls – sometimes, this verification process does not go smoothly. Some students have been required to submit additional documentation, many have reported receiving expired links, and others have been subjected to an export screening process. If you are having any of the issues mentioned, don’t worry – you’re not alone and we’re here to help.
Please see the directions below based on the verification issue you’re experiencing.
Additional Documentation Requested
If you are asked to submit additional documentation, the easiest support documentation you can provide is your ACC student ID. If you are able to, please scan or take pictures of your ACC student ID card and attach them to an email and send it to cad-techsupport-group@austincc.edu.
If you are unable to complete the first form of supplemental identification, you can provide them with a secondary form of identification based on your ACC profile. Please follow the instructions below to obtain a screenshot of the relevant information:
- Go to austincc.edu and click on Students from the top banner.
- Click on Online Services in the table lower right.
- Click on Student Login – My ACC button (purple) and login when the ACC Okta sign in screen appears.
- Click on My Profile in the lower right table.
- Screenshot your personal information (name) with the ACC header, the URL, AND your ACCeID.
- Add as a screenshot to an email and send it to cad-techsupport-group@austincc.edu.
Expired Link
Unfortunately, Autodesk does not name their errors very well and you have encountered one of two possible expired link errors common among students. If you are encountering the issue early in the process (during registration), it is likely a known issue with Autodesk’s website simply not advancing properly. Our guidance has been to return to the Autodesk Education Community website, and sign in via the link in the upper right corner of the page using the credentials you entered to create the account.
- If you are able to sign in: it is the more benign issue – your account has been created, but Autodesk hasn’t gathered all the required information skipped during the registration (and verification) process due to the website not responding properly. After signing in, pick-up with the instructions at the ‘Download’ section above. Autodesk will stop you during the process to gather the omitted information, at which point you will need to backtrack to complete the ‘Registration’ and ‘Verification’ instructions. Once complete, continue with the instructions in the ‘Download’ section where you left off.
- If you are unable to sign in: try creating your account again. If you are able to use the same information, your account was not successfully created and you should be able to continue normally through the instructions. If you are unable to use the same information, please continue with the troubleshooting below.
Unfortunately, the expired link issue you have encountered can only be resolved by Autodesk. That having been said, Autodesk does have a walkthrough for resolving the issue posted here. Please follow the directions linked and, if you are still unable to proceed with account creation or software download, continue with the troubleshooting below.
If after trying the steps prescribed by the Autodesk agent do not resolve the issue, you will need to contact Autodesk’s Education Customer Support using this link – click here. The link will take you to a chatbot – once you click the help with student verification link and then enter something to the effect of email verification expiration, you should be given the opportunity to enter a ‘case’ with their support team. They should be able to provide you with a new verification email, if all else fails.
Export Screening Process
If you receive this notification from Autodesk, please inform us by forwarding the email to cad-techsupport-group@austincc.edu so that we can monitor the situation. Autodesk is sometimes very quick in resolving the screening process, but has also been known to take several days. At the moment, we don’t have a solution to expedite the process, but we can develop contingency plans for you to get you up and running as quickly as possible.
Download and Installation Issues
As pointed out in the notes in step #6 of the Downloads section, students should not attempt to install directly from the website and should check to ensure pop-ups are enabled for Autodesk.com on their browser of choice. To add an exception for Autodesk.com, please follow the directions below for your browser of choice.
- NOTE: If you are using Microsoft Internet Explorer, we recommend that you select a new preferred browser (preferably from the list below) to download and install.
- NOTE: If you are a Mac user and wondering why Safari is not listed, it is because you will download and install Autodesk software to the Windows operating system installed on your machine via Boot Camp or Parallels.
Google Chrome
- Click the three vertical dots in the upper-right corner of your browser window and select Settings from the fly-out menu
- In the left navigation column, click Privacy and security
- Click on the Site Settings tile (bottom of section)
- Scroll to the bottom of the page and click on the Pop-ups and redirects tile
- Next to Allow (bottom option), click the Add button to the right
- Enter Autodesk.com and click the Add button
- Proceed with instructions in the Download section
Microsoft Edge
- Click the three horizontal dots in the upper-right corner of your browser window and select Settings from the fly-out menu
- In the left navigation column, click Cookies and site permissions
- Scroll down to the permissions section and click on the Pop-ups and redirects tile
- Next to Allow (bottom option), click the Add button to the right
- Enter Autodesk.com and click the Add button
- Proceed with instructions in the Download section
Mozilla Firefox
- Click the three vertical dots in the upper-right corner of your browser window and select Options from the fly-out menu
- In the left navigation column, click Privacy & Security
- Scroll down to the permissions section and click the Exceptions… button next to Block pop-up windows entry
- Enter Autodesk.com and click the Allow button
- Click the Save Changes button
- Proceed with instructions in the Download section
License Checkout Timeout OR Trial Expired Issue
- Navigate to the AEC website (click here)
- Sign in to your account by clicking on the ‘Sign in’ link in the upper right corner of the page
- After signing in, check to see if you are presented with an option to renew your account on the main pane banner
- If you see a renewal offer, please click the Renew button and follow the instructions on screen; you will not need to continue on with troubleshooting
- If you do not see a renewal option in your personalized banner, your account is in good standing and your issue is not yet resolved – please continue troubleshooting
- If you wish to check when your account will expire, please:
- Click on your initials in the upper right corner of the page
- Click on ‘My Account’ from the flyout menu
- Click on ‘By User’ (under ‘User Management’) from the left pane navigation menu
- Click on your account tile in the main pane
- You should see a dateline entitled ‘Added to team’ – one year from this date will be your account expiration date
- If you wish to check when your account will expire, please:
- Having already signed in, click on your initials in the upper right corner of the page
- Select ‘Products and Services’ (under ‘My Account’) from the flyout menu
- Under ‘Products and Services’ in the main page area, check to ensure you are seeing your selected application
- If you are not seeing your selected application, please follow the instructions in the ‘Download’ section of this guide (above) and re-download the installer; this will activate the software for your account and enable you use the software
- If you are seeing your selected application, your account is up-to-date and your issue is not yet resolved – please continue troubleshooting
Now we will look at the licensing service that was installed with your Autodesk application. The first option you can try is to simply restart the service; to do this:
- Open the Task Manager (Ctrl + Shft + Esc) and click the down caret next to ‘More details’
- Scroll down the alphabetical list until you see ‘Autodesk Desktop Licensing Service’
- Click on it and then click the End task button in the lower right corner of the window
- Attempt to launch your Autodesk application (launching will automatically relaunch the licensing service)
- If you are able to use your application without receiving the previous error message, you will not need to continue troubleshooting
- If you receive the same error message, please continue troubleshooting
Next, we will check to see if there are available updates to the Autodesk Desktop Licensing Service:
- In the Star menu, click on the Autodesk folder to expand it
- Click on Autodesk Desktop App to launch it
- If required, please sign in using your AEC credentials
- Download and install all available updates (please check back regularly)
- If the Autodesk Desktop Licensing Service was updated, please attempt launching your application again after the update
- If you are able to use your application without receiving the previous error message, you will not need to continue troubleshooting
- If you receive the same error message, please continue troubleshooting
Next, you will need to download and reinstall the Autodesk Desktop Licensing Service:
- Close all Autodesk products
- Download the Autodesk Desktop Licensing Service installer (available here)
- Go to the Downloads folder (or the location to which your downloaded files are saved) and unzip the AdskLicensingInstaller-win-xx.x.x.xx installer file
- Once unzipped, open the containing folder and find the AdskLicensing-installer.exe file
- Right-click the file and select ‘Properties’ from the flyout menu
- Click on the ‘General’ tab and ensure the security ‘Unblock’ checkbox at the bottom is unchecked
- Click the OK button
- Double-click on the AdskLicensing-installer.exe file to run the installation
- Once complete, please attempt launching your application again after the update
- If you are able to use your application without receiving the previous error message, you will not need to continue troubleshooting
- If you receive the same error message, please continue troubleshooting
If you have completed this troubleshooting section and still cannot use your application, you will need to contact Autodesk’s Education Customer Support using this link – click here. The link will take you to a chatbot – enter something to the effect of licensing issue and you should be given the opportunity to enter a ‘case’ with their support team. After you have entered a case with the Autodesk support team, please inform your instructor and/or the A&E CAD Tech Support team (cad-techsupport-group@austincc.edu) so that we may monitor the situation and provide assistance as needed.
Missing Revit Family Templates and Libraries
Autodesk has changed the installation process regarding Revit’s libraries and family templates – only a small subset of files are included in the application installation files. In order to get the complete set of files, you will need to download and extract the files separately.
If you wish to download libraries and family templates one-at-a-time on an as-needed basis, you can use the ‘Load Autodesk Family’ button located on the Insert tab of the ribbon in Revit (2021 and later).
If you wish to download the entire content package from Autodesk directly, containing all libraries and family templates, please follow the directions below:
- Click here to launch the Revit Template Troubleshooting Tool in a web browser
- You will be asked a series of questions in order to direct you to the correct content page:
- First, click the ‘Missing family content or templates’ tile
- Then click the tile that best describes your version of Revit
- Next, click the ‘Download Autodesk Content’ tile
- Then click the link of your specific version of Revit
- A new browser tab will open to the Content page for your selected version of Revit
- Scroll down to the US English download row – it should be second from the bottom of the first table
- Click the link to the right of the table, RVTCPENU.exe, to download the content package
- Locate the EXE file in your Downloads folder (or the location to which you download files) and double-click on it to run the extractor
- The installer will auto-launch after the extractor completes
- Click on the Install button
- After the installer finishes, click the Finish button
Resolve DLL Load Issues
A common issue with Autodesk applications is a failure to launch because a particular DLL file will not load. The issue typically appears in an error message stating “[Application] could not load C:\Program Files\Autodesk\[Application]\[Filename].dll”. This issue is typically a conflict between Microsoft Visual C++ packages and Autodesk DLLs; the issue is actually a missing dependency the DLL needs in order to ‘load’ properly. To resolve this issue, please follow the instructions below to reinstall the Microsoft Visual C++ packages:
- Click on your Start menu or the search field on the taskbar
- Type cmd to find your Command Prompt application
- Right-click on the Command Prompt tile in your Start menu and select ‘Run as Administrator’
- Copy-and-paste or type: WMIC Product Where “Name Like ‘%Visual C++%'” Call Reinstall
- Hit the ‘Enter’ key and await the command to complete
- Attempt to re-launch your Autodesk application
Resetting Your Profile
A common issue with Autodesk applications is the user profile becoming lost or corrupt; this issue manifests itself in two ways:
- as FATAL ERRORs, which appear when attempting to launch your application, OR
- as irretrievable, undocked toolbars and workspaces, orphaned in previous work sessions
Both of these issues may be resolved by restoring your profile settings to defaults. In order to do so, please navigate to your chosen Autodesk application below and follow the directions provided.
Reset AutoCAD Profile
- Ensure all Autodesk applications are closed
- Launch the Registry Editor by entering regedit into the search field in the taskbar
- Browse to the following key and rename it by appending .bak to the end of the key name (ie. ACAD-4100:409.bak):
- HKEY_CURRENT_USER\Software\Autodesk\AutoCAD\[release version]\ACAD-[product version]:[language version]
- Close the Registry Editor and open an instance of Windows File Explorer
- Browse to the following folder and rename it by appending .bak to the end of the folder name (ie. AutoCAD 2021.bak):
- C:\Users\[username]\AppData\Roaming\Autodesk\AutoCAD 20XX
- C:\Users\[username]\AppData\Local\Autodesk\AutoCAD 20XX
- Relaunch AutoCAD to initiate the secondary installer, re-creating the keys and files previously .bak updated
Reset Civil 3D Profile
- Ensure all Autodesk applications are closed
- Launch the Registry Editor by entering regedit into the search field in the taskbar
- Browse to the following key and rename it by appending .bak to the end of the key name (ie. ACAD-4100:409.bak):
- HKEY_CURRENT_USER\Software\Autodesk\AutoCAD\[release version]\ACAD-[product version]:[language version]
- Close the Registry Editor and open an instance of Windows File Explorer
- Browse to the following folder and rename it by appending .bak to the end of the folder name (ie. C3D 2021.bak):
- C:\Users\[username]\AppData\Roaming\Autodesk\C3D 20XX
- C:\Users\[username]\AppData\Local\Autodesk\C3D 20XX
- Relaunch Civil 3D to initiate the secondary installer, re-creating the keys and files previously .bak updated
Reset Inventor Profile
- Ensure all Autodesk applications are closed
- From the Start menu, click on the Autodesk Inventor 20XX tile to expand it
- Click on the Inventor Reset Utility tile to launch the service
- Select your version in the right selection pane and click on the Reset button
- Click the OK button to complete the reset
- You may exit the service and relaunch Inventor
Reset Revit Profile
- Ensure all Autodesk applications are closed
- Browse to the following folder and rename it by appending .bak to the end of the folder name (ie. Autodesk Revit 2021.bak):
- C:\Users\[Username]\AppData\
Roaming\Autodesk\Revit\ Autodesk Revit 20XX
- C:\Users\[Username]\AppData\
- Launch the Registry Editor by entering regedit into the search field in the taskbar
- Browse to the following key and rename it by appending .bak to the end of the key name (ie. Autodesk Revit 2021.bak):
- HKEY_CURRENT_USER\Software\Autodesk\Revit\Autodesk Revit 20XX
- Relaunch Revit to initiate the secondary installer, re-creating the keys and files previously .bak updated
UNINSTALLATION
Versions 2022 and Later
Beginning with Autodesk 2022 applications, Autodesk no longer requires or supports the Autodesk Uninstall Tool.
Instead, all Autodesk 2022 applications can now be uninstalled via the Add or remove programs menu and/or the Programs & Features menu from the Control Panel of your Windows machine.
Uninstall via (Add or Remove Programs)
To uninstall via Add or remove programs, follow the instructions below:
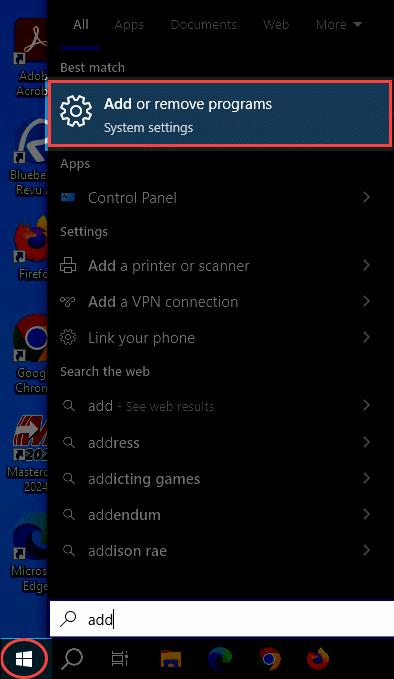
- Click on the Start menu
- Start typing “Add..” then select “Add or Remove Programs”.
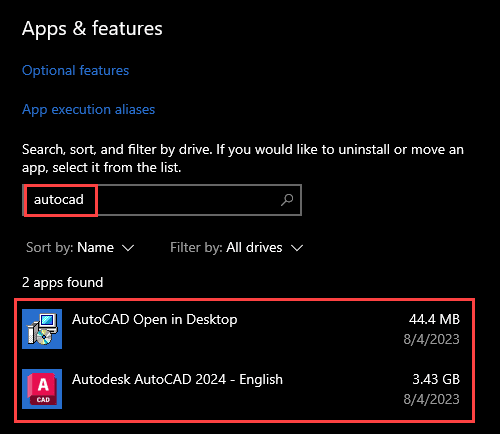
3. Under “Apps & features”, search for your Autodesk application (for example, “AutoCAD”).
- You’ll see a list of the software you are searching for to the bottom of the search bar.
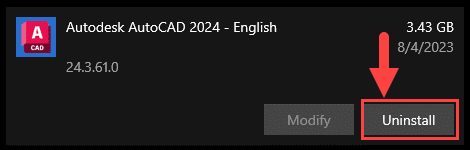
4. Select the product you wish to uninstall.
5. Select “Uninstall”.
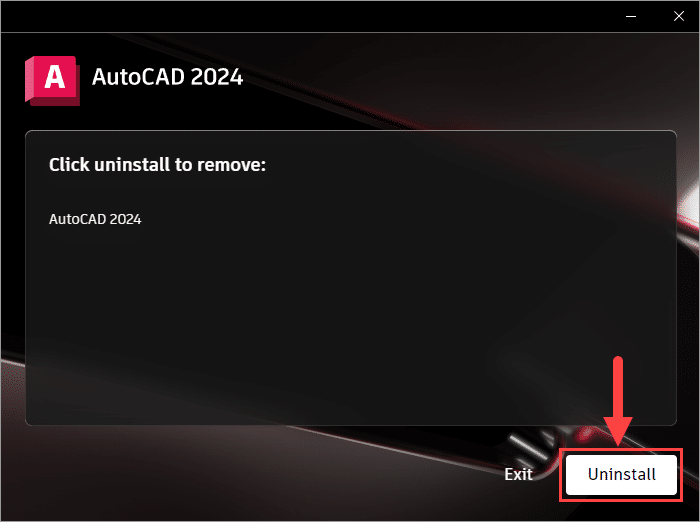
6. You’ll see the Autodesk uninstall wizard launch.
7. Select “Uninstall”.
8. After this, you should see the Autodesk uninstall wizard launch, select “Uninstall” once again.
After following the steps above, your Autodesk application should now be removed!
Uninstall via (Programs & Features)
To uninstall via Programs & Features, follow the instructions below:
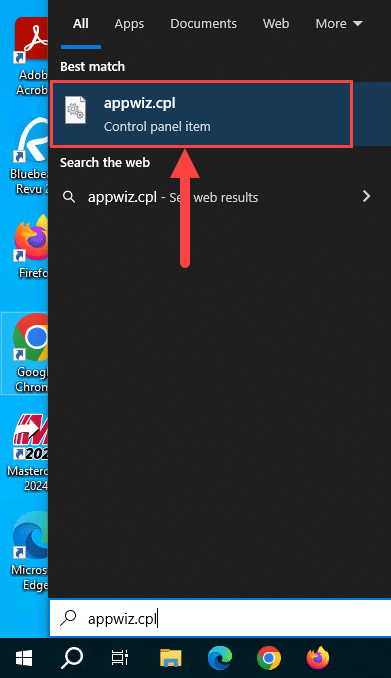
- Click on the Start menu
- Type appwiz.cpl, then hit Enter.
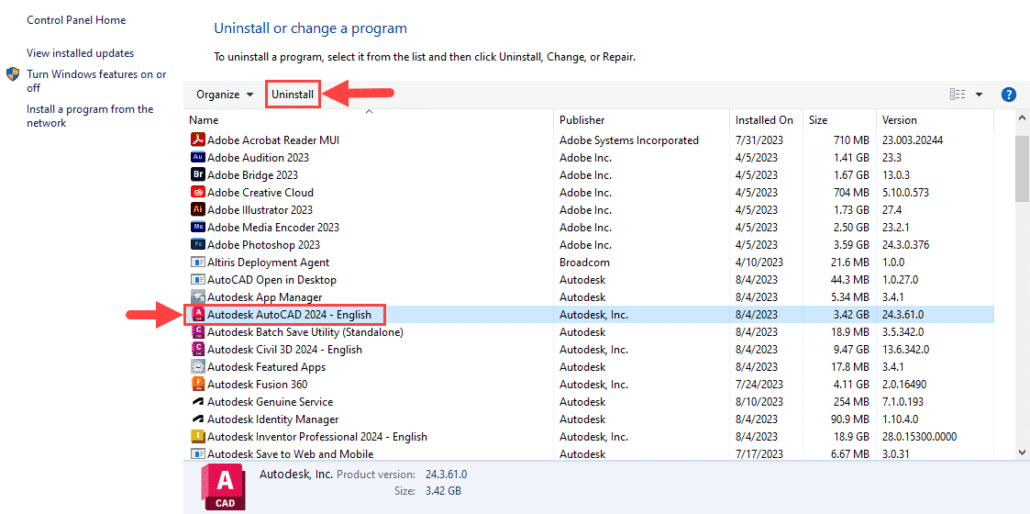
4. Select the application you wish to uninstall from the application table
5. Click on the Uninstall button from the grey ribbon (above the application table).
6. Follow the prompts to complete your uninstallation.
After following the steps above, your Autodesk application should now be removed!
Versions Prior to 2022
Autodesk applications download and install a variety of support software and services that your primary application requires to run.
Due to overlapping dependencies, uninstalling an Autodesk application is not as straightforward as uninstalling other applications – most need to be uninstalled in a very specific order or components of your software may become unresponsive and won’t be able to be uninstalled or repaired without their dependencies being reinstalled first.
Because of this, Autodesk developed an ‘Uninstall Tool’ that will uninstall applications and all dependent software in the correct order.
If you wish to uninstall an Autodesk application, please follow the directions provided below.
- Click on your Start menu and scroll down to the Autodesk folder.
- Click on the folder to expand the options underneath it.
- You should see an option for the “Uninstall Tool” – click on it to open the application.

- Select the checkbox next to the application you wish to remove – you will notice each application name slightly left of the indented software dependencies beneath it.
- By selecting the top-most, non-indented checkbox, all dependent features will be automatically selected.
- Click the Uninstall button in the lower right of the window to uninstall your selected application(s) in the proper order.

When the uninstallation is complete, you will not receive any notification other than the status bar (in blue at bottom).
Simply click the Exit button when complete to finish the uninstallation.